NetApp Disk Ownership tutorial

In this NetApp tutorial, you’ll learn about disk ownership and how it’s assigned to the disks in your cluster. Scroll down for the other text tutorials.
Disks and the aggregates that are made up of those disks are owned by one and only one node. The node’s HA peer can take ownership of the disks if the first node fails.
Let’s say we’ve got an HA peer with Controller 1 and Controller 2. Controller 1 owns its disks, and Controller 2 owns its disks. If Controller 1 fails, Controller 2 will detect that and take over ownership of Controller 1’s disks until Controller 1 comes back up again.
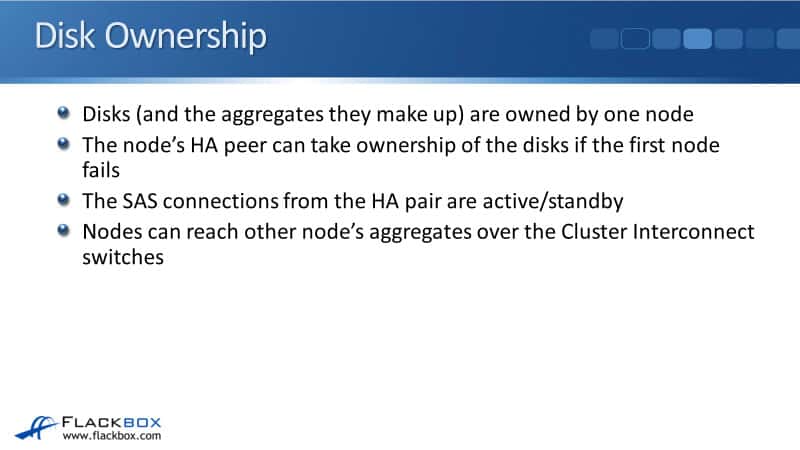
The SAS connections from the HA peer are active/standby. So, you do not get load balancing on both SAS connections going down to the disk shelves.
Controller 1 and Controller 2 are connected to the same stacks of disks with those SAS connections, but only Controller 1 or Controller 2 will send traffic over both SAS connections.
If the disks are owned by Controller 1, then it’s Controller 1’s SAS connections that are active, and Controller 2’s connections are on standby.
If Controller 2 takes over ownership of those disks, Controller 2’s SAS connections will transition to active. On the other side, for the disks owned by Controller 2, its SAS connections are active, and Controller 1’s connections are on standby.
They only come into effect if Controller 2 fails and Controller 1 takes over ownership of its disks. So again, for both SAS connections, you don’t get active/active load balancing through both. It’s active/standby for redundancy.
Nodes can reach another node’s aggregates over the Cluster Interconnect switches. So the incoming client connections don’t always have to hit the node that owns the disks.
For example, let’s say we’ve got an aggregate made up of disks owned by Controller 1. The incoming client connections do not have to terminate on Controller 1 to get access to that data.
The incoming client connections can hit any node on the cluster, and we can still reach that data over the Cluster Interconnect onto Node 1 and then through its SAS connections down to the disks.
Clustered Operation
It will be easier to understand and visualize this with a diagram. In our example, I have got a two-node cluster.
I’ve got Controller 1 and Controller 2. Controller 1 is on the left, its disks are on the left, and Controller 2 is on the right, and its disks are on the right.
We will be talking about Aggregate 1 on this shelf here on the bottom, which is owned by Controller 1.
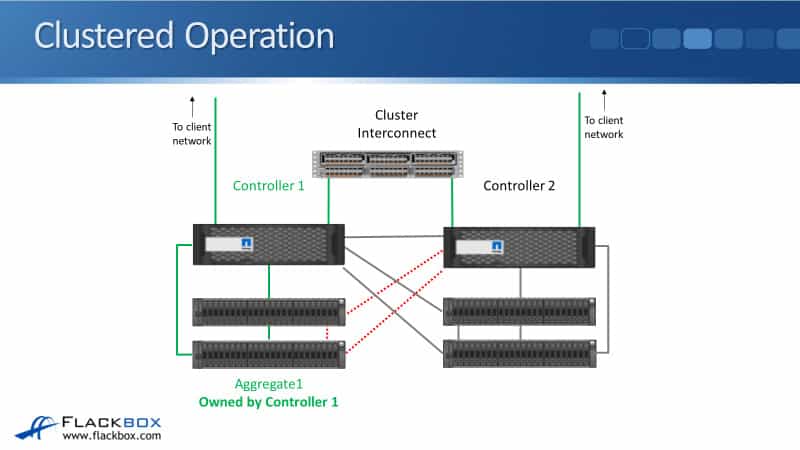
Both of the controllers are connected to the cluster network and are also connected to a data network, which is used for incoming client connections.
The clients can send traffic to read or write data, terminating on a port on Controller 1 or Controller 2.
Direct Data Access
The first example is that a client wants to read or write data on Aggregate 1, owned by Controller 1 and that incoming connection terminates on Controller 1.
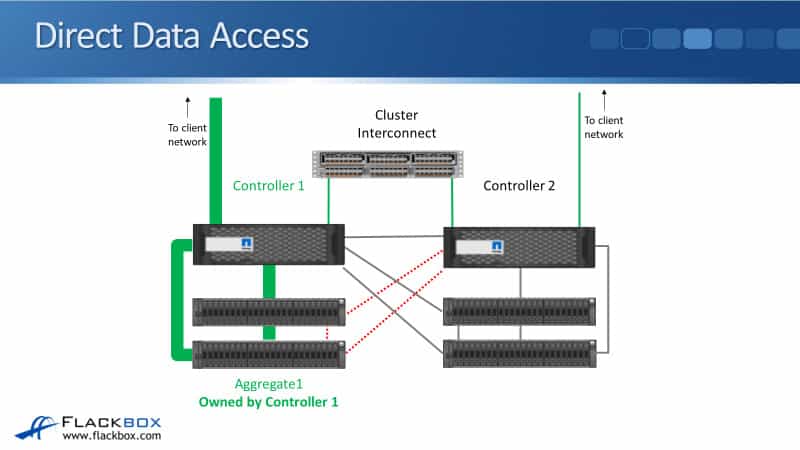
So let’s say that it is NFS, for example, and the incoming connection hits an IP address, which is homed on Controller 1.
So, the traffic comes in over the data network, it hits Controller 1, and then Controller 1 will read or write to the disks over its SAS connections.
Indirect Data Access
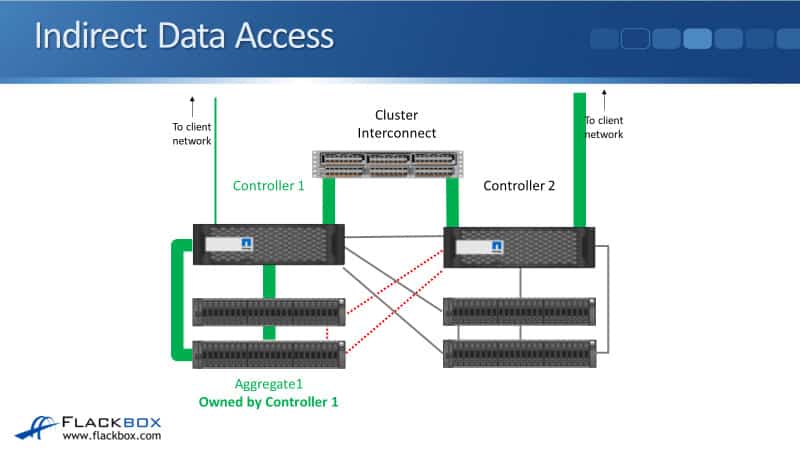
Next example, let’s say the client is again accessing Aggregate 1. But this time, rather than hitting an IP address on a port on Controller 1, they hit a different IP address on a port on Controller 2.
You don’t want all of your incoming connections coming in just to one controller.
You’ll get better performance on your cluster if you spread and load balance those incoming client connections.
You’ll want them to come in on all the different nodes in your cluster. Sometimes they’ll hit Controller 1, and sometimes incoming client connections will hit Controller 2.
Here, the incoming connection has hit Controller 2, and they want to access data on Aggregate 1. Controller 2 does not use its SAS connections going down to those shelves.
It is active/standby, so it’s active on Controller 1 because it owns the disks and is on standby on Controller 2. It’s not used unless it takes ownership of those disks because Controller 1 fails.

Right now, Controller 1 is up. This is the normal operation. So Controller 2 still has access to those disks, but the traffic will go over the Cluster Interconnect.
The amount of latency added going over the Cluster Interconnect is very small.
So you actually get the best performance of your cluster by spreading the incoming connections over the different nodes in your cluster.
Controller Takeover
Now, let’s say that Controller 1 does actually fail. So Controller 1 goes down, Controller 2 will detect that, and then it will take ownership of Controller 1’s disks when High Availability (HA) kicks in.
At this point, the SAS connections from Controller 2 go active down to those disks where Aggregate 1 is.
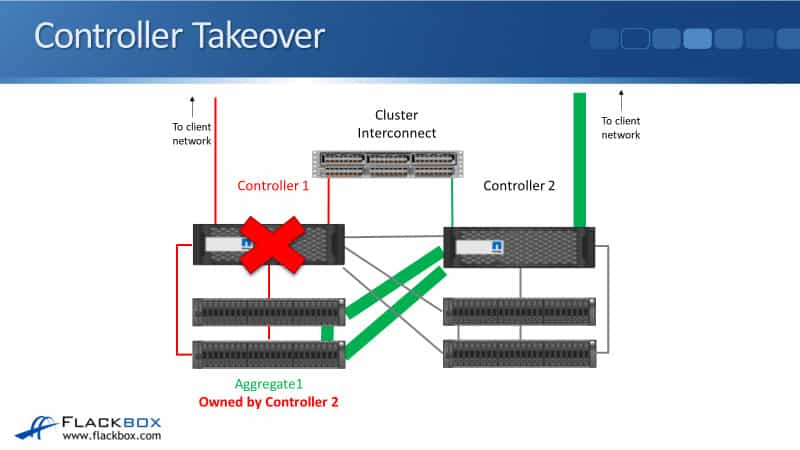
Now we have an incoming client connection, so it can’t come in in Controller 1 because Controller 1 is down. We have an incoming client connection on Controller 2, and Controller 2 will access the data over its SAS connections going down to the disks.
In a lot of environments, we’re going to have more than two nodes in the cluster.
So, you can see in the diagram that I’ve got a four-node cluster. Controller 1 and Controller 2 are an HA pair, and Controller 3 and Controller 4 are an HA pair.
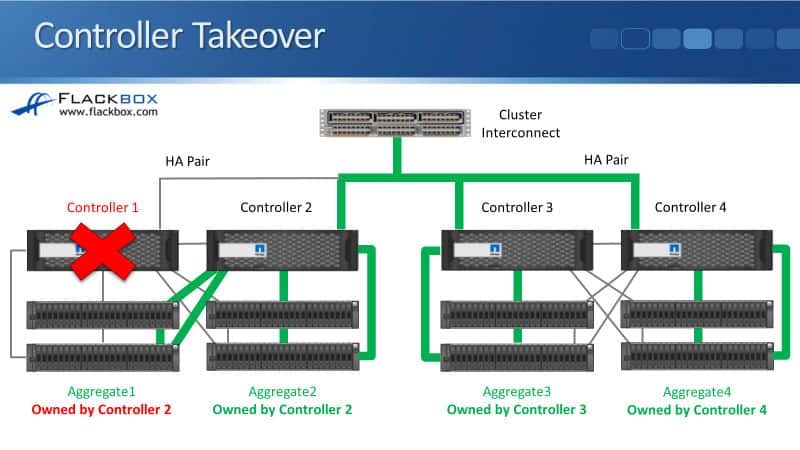
Each of the controllers originally had its own disks, which it owned. In our example, Controller 1 has gone down, and Controller 2 is its HA pair. So Controller 2 will take ownership of its disks.
Currently, Controller 2 owns Aggregate 1, which is normally owned by Controller 1, and it also owns Aggregate 2, which is normally owned by itself.
So it is active for the SAS connections going down to Aggregate 1 and Aggregate 2 as well. Controller 3 is active for its aggregate, and Controller 4 is active on the SAS connections going down to its aggregate.
We’ve got three nodes, three controllers, still up in our cluster. Whenever a client wants to access Aggregate 2, 3, or 4, it can access that data through any of the different nodes.
If, for example, a client wants to access Aggregate 3 and the incoming client connection hits Controller 2, then the data will be accessed over the Cluster Interconnect to Controller 3 and then through the SAS cables down to its disks.
Aggr0 and Vol0
We have an aggregate zero (Aggr0) and a volume zero (Vol0) on every node in the cluster.
When the system is powered on, it loads the ONTAP system image, the operating system, from CompactFlash. It then loads the system information from the disk.
So any configuration that you do on the system will be saved to disk, and that information gets saved into Vol0, which is located in Aggr0.
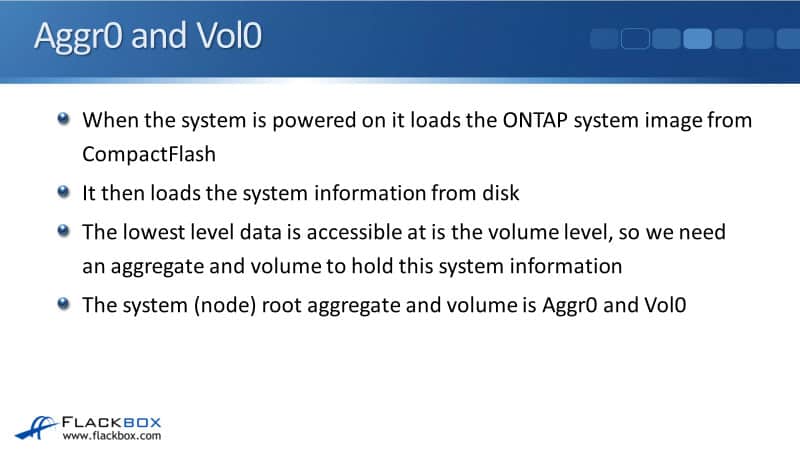
The lowest level that data is accessible is at the volume level. So we need an aggregate and a volume to hold that system information, which is Vol0 and Aggr0.
Vol0 and Aggr0 are not used for any normal user data. They are used purely for system information.
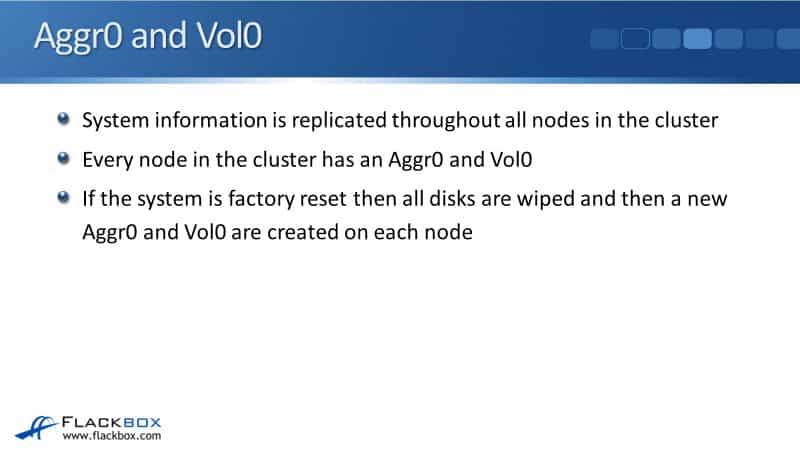
The system information is replicated throughout all the nodes in the cluster. Let’s say that you open up an SSH session for management, and you connect to the cluster management address.
Let’s also say that that cluster management address is currently homed on a port on Node 1. When you write the information, it will be written to Node 1 first and go into its Vol0.
That information will be replicated over the Cluster Interconnect to all the other cluster nodes. They will all end up with the same information in their Vol0s.
So, every node in the cluster has an Aggr0 and a Vol0, and the information is replicated between all of them.
If the system is factory reset, all disks will be wiped, and then a new Aggr0 and Vol0 will be created on each node in the cluster.
Disk Ownership
Ownership of disks must be assigned to a specific node in the HA pair before disks can be used, and disk auto assign is enabled by default.
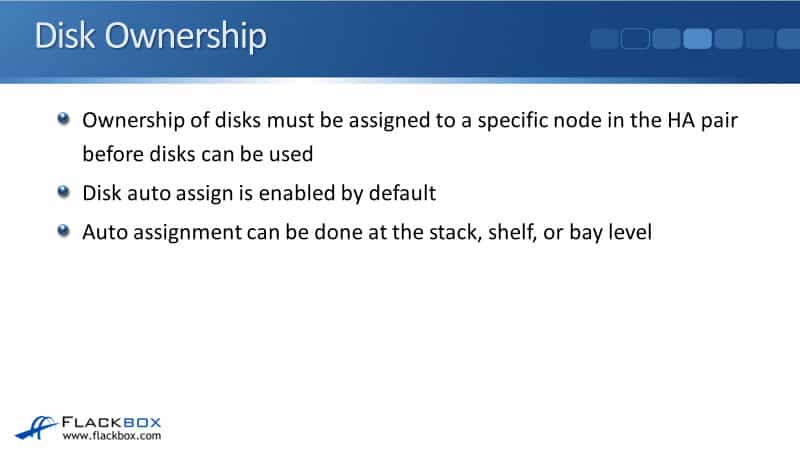
So normally, whenever you put a new disk in the system, everything is hot-swappable.
If you put a new disk in there, it will be automatically assigned to one of the nodes, and that auto assignment can be done at the stack, the shelf, or the bay level.
That means that at the stack level, all disks in a stack will be assigned to the controller connected to the IOM-A on the stack.
The back of our disk shelves had I/O module A and I/O module B. One of the controllers is connected to IOM-A, and the other one is connected to IOM-B.
So if disk ownership is configured to work at the stack level, then the controller connected to IOM- A on the stack will own all the disks in that stack.
That is the default for the non-entry-level platforms, which also ties up with the earlier examples.
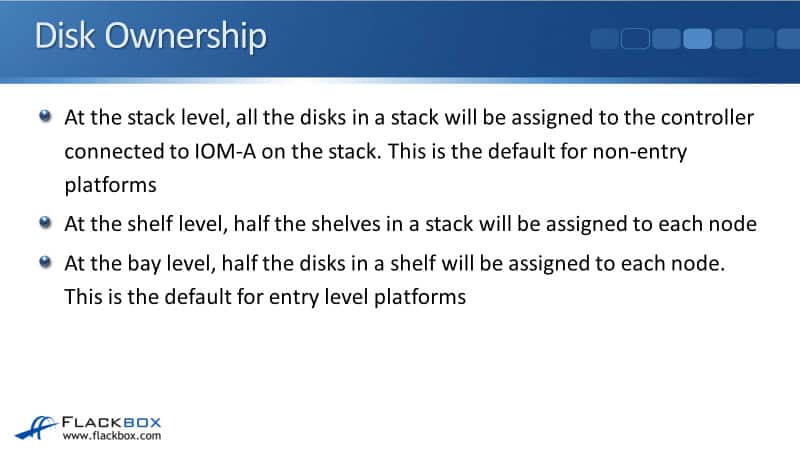
Another option that you can configure is to assign disk ownership at the shelf level. If you do that, half the shelves in a stack will be assigned to each node.
With the first one, all the disks in a particular stack are owned by one node. If you choose shelf level, then in the same stack, half will be owned by one node, and the other half will be owned by the other.

The last option that we have is at the bay level. At the bay level, half the disks in a shelf will be assigned to each node, which is the default for entry-level platforms.
The reason for that is that with many entry-level platforms, they will have internal drives there. It’s just used for a small deployment, and they don’t have any external disks.
So obviously, if we use the stack or the shelf level there, all the disks would end up being owned by one node.
It wouldn’t be good for performance, for load balancing. We don’t want to do that.
So in those small entry-level platforms with just one set of internal drives, we want half the drives to be owned by one node and half by the other node.
That’s why the default is bay level on the entry-level systems.
Automatic disk assignment is enabled by default, but you can disable it if you want to.
If you do that, you’ll have to manually assign any new disks you add to the system before they can be used.
So by default, auto assign is turned on. If you just hot-swap a drive in, it will be automatically assigned ownership by one of the nodes, and you can use it immediately.
If you do turn off auto assign, then you have to remember whenever any new disks are added to the system, you’re going to have to manually specify the node which owns them.
You would do that if you wanted to have more granular control over which node owns your disks.
Additional Resources
About Automatic Assignment of Disk Ownership: https://docs.netapp.com/us-en/ontap/disks-aggregates/disk-autoassignment-policy-concept.html
Change Settings for Automatic Assignment of Disk Ownership: https://docs.netapp.com/us-en/ontap/disks-aggregates/configure-auto-assignment-disk-ownership-task.html
Manually Assign Disk Ownership: https://docs.netapp.com/us-en/ontap/disks-aggregates/manual-assign-disks-ownership-prep-task.html
learn more
cisco ospf-basic configuration
NetApp AFF Platform Overview and Tech Specs
Cisco Bandwidth vs Clock Rate and Speed
NetApp AFF Platform Overview and Tech Specs